
Vermilion snapper is one of those fishes that doesn’t taste “fishy” at all. It is superb for those who don’t really like fish, but want to incorporate more lean cuts and omega-3s in their diet.
Snapper is delicate, juicy, and mild, and due to that, it can be prepared in a million different ways! Here are the BEST 7 ways to cook vermilion snapper that will make it your favorite fish!
If you love one-pan dinners, prepare snapper with a side dish in an oven. For a crispy bite, definitely go for blackened or pan-seared fish. Fish tacos are staples, especially if you drizzle fine-quality sauce on top! Poaching fish is the healthiest method, but there are tricks to make it extremely flavorful, too!
Fish dinner Fridays are a staple in my household, so I’m always searching for new and fun recipes. Vermilion snapper is a splendid fish, but you will need a few tricks to prepare it perfectly.
7. Pan-Searing

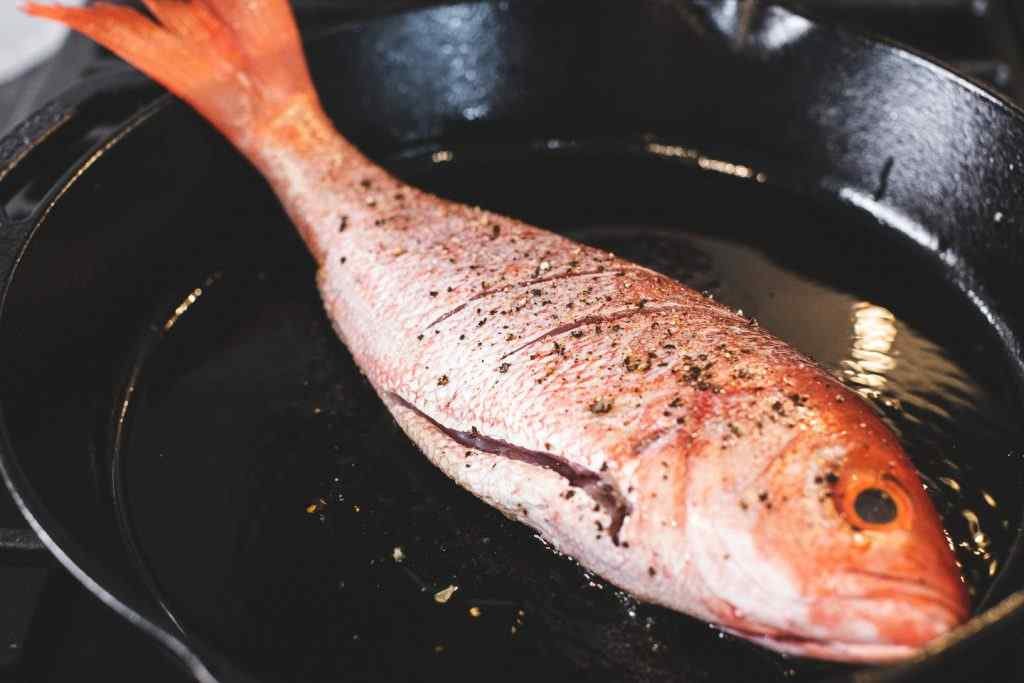
Pan searing is one of the tastiest ways to prepare fish. You will get an incredibly crispy crust, almost caramelized, but the insides will be super juicy and tender.
That’s because you are going to fry it at the highest temperature for a very short time. For this, choose good quality pans; cast iron or carbon steel pans, for example.
Also, you need to choose the right oil for frying. The best are flavorless oils like canola or vegetable oil. But, avocado and safflower oil pair flawlessly with fish!
You could also use butter, but keep in mind it is prone to burning, especially if you’re using dried herbs.
Vermilion snapper is a tender fish, that’s why you don’t need more than 10 minutes to prepare it, as quick searing is just enough. Otherwise, if you continue to cook it afterward, it will come out mushy, flavorless, and overcooked.
Sear the fish for 5 minutes on each side at high temperature and that’s all. If you want to be completely sure that is thoroughly cooked, use a thermometer. When the inner temperature reaches 145 degrees – it is done.
Before searing, massage coarsely ground sea salt, pepper, and flour over the fillet so it can be even crunchier. That way, you will get a crisp and nice golden color.
For even more flavor, when the fish is nearly done, add butter, wine, and fresh herbs like rosemary or thyme to the pan as well. The fish will soak up all the aroma but stay crispy, just serve it immediately.
Serve it with anything you love, like potato salad or cooked rice. For a bit of creaminess, go for avocado or mustard sauce, and don’t forget a squeeze of lemon!
6. Grilled

First things first, prepare the grill. To prevent fish from sticking to the grate, preheat the grill very well. This will secure you two things – easy flipping and perfect grill marks!
Also, before arranging fish on the grill, use a stainless steel brush to clean the grates thoroughly, as any residual fat or debris can mess up your plans.
On the other note, be super careful when flipping the fish, and do it only once! Use two spatulas and slowly insert them in between the grates and fish. Also, don’t force it as fish cooked enough will detach itself from the grill.
Now, on the fun part!
Fish kissed with fire always has a special smack. You can season it with basics only and it will be flavorful enough due to its signature smoky aroma.
For this prep process, you need even less time than for pan searing. 3 to 5 minutes per side for fillets is more than enough for it to be ready to eat! That means the whole fish is done for about 6-8 minutes per side.
Again, you can insert a thermometer and check if the temperature is 145 degrees. If you’re grilling the fish uncovered, you will maybe need a few minutes more for it to reach the right inner temperature.
Now, let’s see how to spice things up a bit! Make a spice mix combining salt, pepper, paprika, cayenne pepper, dried herbs, garlic and onion powder. When it comes to herbs, choose signature Mediterranean for the best flavor, like rosemary, thyme, and oregano.
You can change this for Cajun spice mix and even add some chili powder if you like the heat. Coat the fish with spices and grill regularly.
For side dishes, go for grilled veggies, like peppers, zucchini, asparagus, or simple fresh vegetable salad.
5. Roasted

One-dish dinners are the best! You can bake the entire fish or fillets in one sheet and with a side dish, as well.
When preparing a whole snapper in the oven, make sure to carve it with a knife on top diagonally, into about 2-inch-thick pieces. That way, spices will penetrate into the meat properly.
Most of the flavor, though, comes from the filling. Cut the fish through the middle, to create a pocket-like space and stuff it with herbs, spices, and citruses. A splash of white wine while it is baking will skyrocket the taste, as well.
Garlic, slices of lemon, orange, or lime, and a few branches of rosemary or thyme are top-notch choices to pair with snapper.
You could also blend garlic, lemon juice, parsley, and basil into a paste, and use that as both stuffing and coating.
For those who fancy bolder flavors, consider this Chinese spice combination. Season the fish with soy sauce, mirin for umami touch, ginger, and scallions. You will have notes of tanginess, sweetness, and spiciness.
If you’re going for a softer texture, you can wrap it in aluminum foil. That way, you will get an almost cook-like consistency and prevent all of the fishy odors. Also, a baking pan or casserole dish with a lid is a top-notch option.
Snapper baked regularly on a baking sheet will be soft inside but with a slight crisp on top. If your oven runs hot, consider putting a piece of aluminum foil on top for the first half of the baking.
Choose deeper pan sheets for this, as the fish is super juicy and it could overspill. But, by far the best pan for baking fish is a glass one, as it will heat up slowly and make the fish beautifully opaque.
When preparing snapper fillets, you only have to rub them with spices and they are ready for baking. Of course, they have different baking durations, as fillets are much more tender.
Bake the fish at 400 – 430 °F, depending on how strong your oven is. Fillets are ready in under 20 minutes, while you need somewhere between 30 to 40 minutes for a whole fish.
Baked fish is far more flavorful when you prepare it on a bed of citrus slices or vegetables. Definitely opt for gemstone potatoes, rainbow carrots, colorful bell peppers, or shallots.
4. Broiled

Fish fillets are very delicate cuts to handle, so before starting anything it’s crucial to determine how thick they are. Medium-thick fillets are perfect for broiling, thin enough to cook quickly, but thick enough not to dry out.
Place a baking sheet 5-6 inches below the broiler. The thicker the fillet, the further it should be from the flame, otherwise it will burn on top and stay undercooked in the middle.
This is a rapid technique, that requires 5-7 minutes of your time without flipping. The best advice is to stay near your oven, as it takes a second for the fish to burn. Monitor it while it broils, so you can remove it just in time.
Also, coat the whole fillet in oil before cooking as that will promise you a nice crust on both sides. Also, it is handy to line a broiler pan with a piece of aluminum foil.
If you’re preparing fillets with skin, turn it skin side down and prick it a few times as it tends to shrink. For a finishing touch, squeeze some lemon juice on top and sprinkle some finely chopped fresh herbs.
You can, undoubtedly, add some vegetables to serve as a side dish. Go for anything you like! Also, the polenta in this combination is smashing!
For the finest taste, assemble the relish on the side to drizzle over the fish with olive oil, fresh lemon juice, fresh herbs, and garlic.
3. Poached

Poaching is probably the healthiest method to prepare fish. First things first, choose the liquid – go for water or fish stock for a base.
Naturally, the stock will infuse the fish with much more flavor than plain water, but either is fine. You can, but don’t have to add some white wine, too. It will, indeed, be more flavorful.
But, most of the flavor actually comes from vegetables, spices, and herbs you cook fish with. Besides the obvious staples like rosemary, thyme, parsley, garlic, and citruses, try adding some fresh ginger and bay leaves for a strong herbal aroma.
Adding onion and fresh dill into the poaching liquid will infuse the snapper with delicate, slightly sweet notes.
The thing with poaching is that you need lower temperatures, like 160 – 180 °F, so the liquid is not vigorously boiling, but barely simmering. If you’re a poaching rookie, definitely use a thermometer.
Poached fish is incredibly tender, almost silky, so to keep those elegant vibes, serve it with some creamy sauce. Choose lemon, parmesan, wine, cashew, or coconut-based sauce for a tropical twist.
2. Blackened

Snapper is an ideal fish for blackening, as it has a firm, juicy texture, the same as cod, tilapia, or bass. For a heads up, this method is quick but tricky, because it is a thin line between perfectly blackened and burnt, inedible pieces of fish.
No matter what ingredient you’re blackening, the steps are always the same. So, drench the fish fillet in melted butter, coat it heavily in a spice and herbs mixture, and cook it in an extremely hot, around 500 °F, iron cast pan.
Speaking of pans, cast iron is traditionally used and it’s the best! You will get the signature crust using only this type of pan, as any other material won’t give you the same effect.
The spice mix is very specific here, as it MUST contain dried herbs and, normally, cayenne pepper. It consists of salt, pepper, paprika, garlic and onion powder, and herbs, such as thyme, rosemary, and parsley.
Mix up this Cajun seasoning according to your spice toleration, as the flavors will be even more prominent when blackened.
You don’t need more than 3 minutes per side for the fillets to be ready, just handle them carefully so they don’t fall apart.
P.S. There will be A LOT of smoke to start with, as you are purposefully burning the outside of the fish. So, make sure you have proper ventilation in your kitchen, otherwise choose any other listed method.
1. Fish Tacos

If you have leftover fish from last night’s dinner, fish tacos for lunch are inevitable! You can use fish prepared in any way listed above, it all comes down to your personal preference.
Perfectly cooked fish is delicate, so you need to be a tad careful when breaking it apart, as it can become mushy if pressed too hard. You don’t need any fancy tools, only a fork.
Follow the stripes on your fish fillet and effortlessly disassemble it. That way you will get perfect bite-size chunks for tacos.
You don’t have to, but it is highly recommended to heat up your tacos before assembling them. Not only they will be easier to handle and not torn apart, but also this simple step will skyrocket the taste.
You can brown them slightly or even crisp them up in the oven, it’s up to you!
Last, but not least – tacos are incomplete without a smashing sauce on top, that’s the best part! You can stick with classic, but let’s see how to spice things up a notch.
If you love them tangy, cilantro and lime sauce is amazing! For a spicy taco experience, jalapeño sauce with avocado and Greek yogurt is the best choice.
Sweet and hot combos are chief, so it’s not a surprise that mango salsa is so popular. Also, salsa verde, chipotle mayo, and sambal oelek are so worth trying!
And lastly, zesty crema is so good with tacos (and everything really), but it is kind of slept on. It is super simple to put together; just mix together sour cream, lime (or lemon), garlic, and salt – nothing else.

