

Freezing collards preserves these nutritious greens for year-round enjoyment while maintaining their robust flavor and essential nutrients. This Southern staple transforms from a seasonal vegetable into a convenient freezer staple ready for soups stews or traditional side dishes.
Freezing collard greens requires blanching the leaves removing stems cleaning thoroughly and properly packaging them for long-term storage. When done correctly frozen collards can last up to 12 months while retaining their taste texture and nutritional benefits.
Food preservation doesn’t need to be complicated and freezing collards offers an excellent way to reduce food waste while ensuring a steady supply of healthy greens. Whether harvested from a home garden or purchased during peak season properly frozen collards deliver farm-fresh taste whenever needed.
“1. Wash and remove stems
Fresh collard greens require thorough cleaning before freezing. Start by filling a large sink or basin with cold water. Submerge the collard leaves completely to dislodge dirt particles sand or insects. Repeat this process 2-3 times until the water runs clear.
Next, tackle the stems with these simple steps:
- Lay each leaf flat on a cutting board
- Hold the stem end firmly
- Strip the leafy part away from the thick center stem in one motion
- Stack the cleaned leaves in neat piles for blanching
Pro Tip: Save the stems for pickling or adding to vegetable stock.
| Characteristic | Clean Collards | Dirty Collards |
|---|---|---|
| Color | Vibrant green | Dull with spots |
| Texture | Smooth surface | Gritty feeling |
| Water runoff | Clear | Muddy or cloudy |
| Leaf surface | Free of debris | Visible dirt/sand |
2. Cut into desired pieces
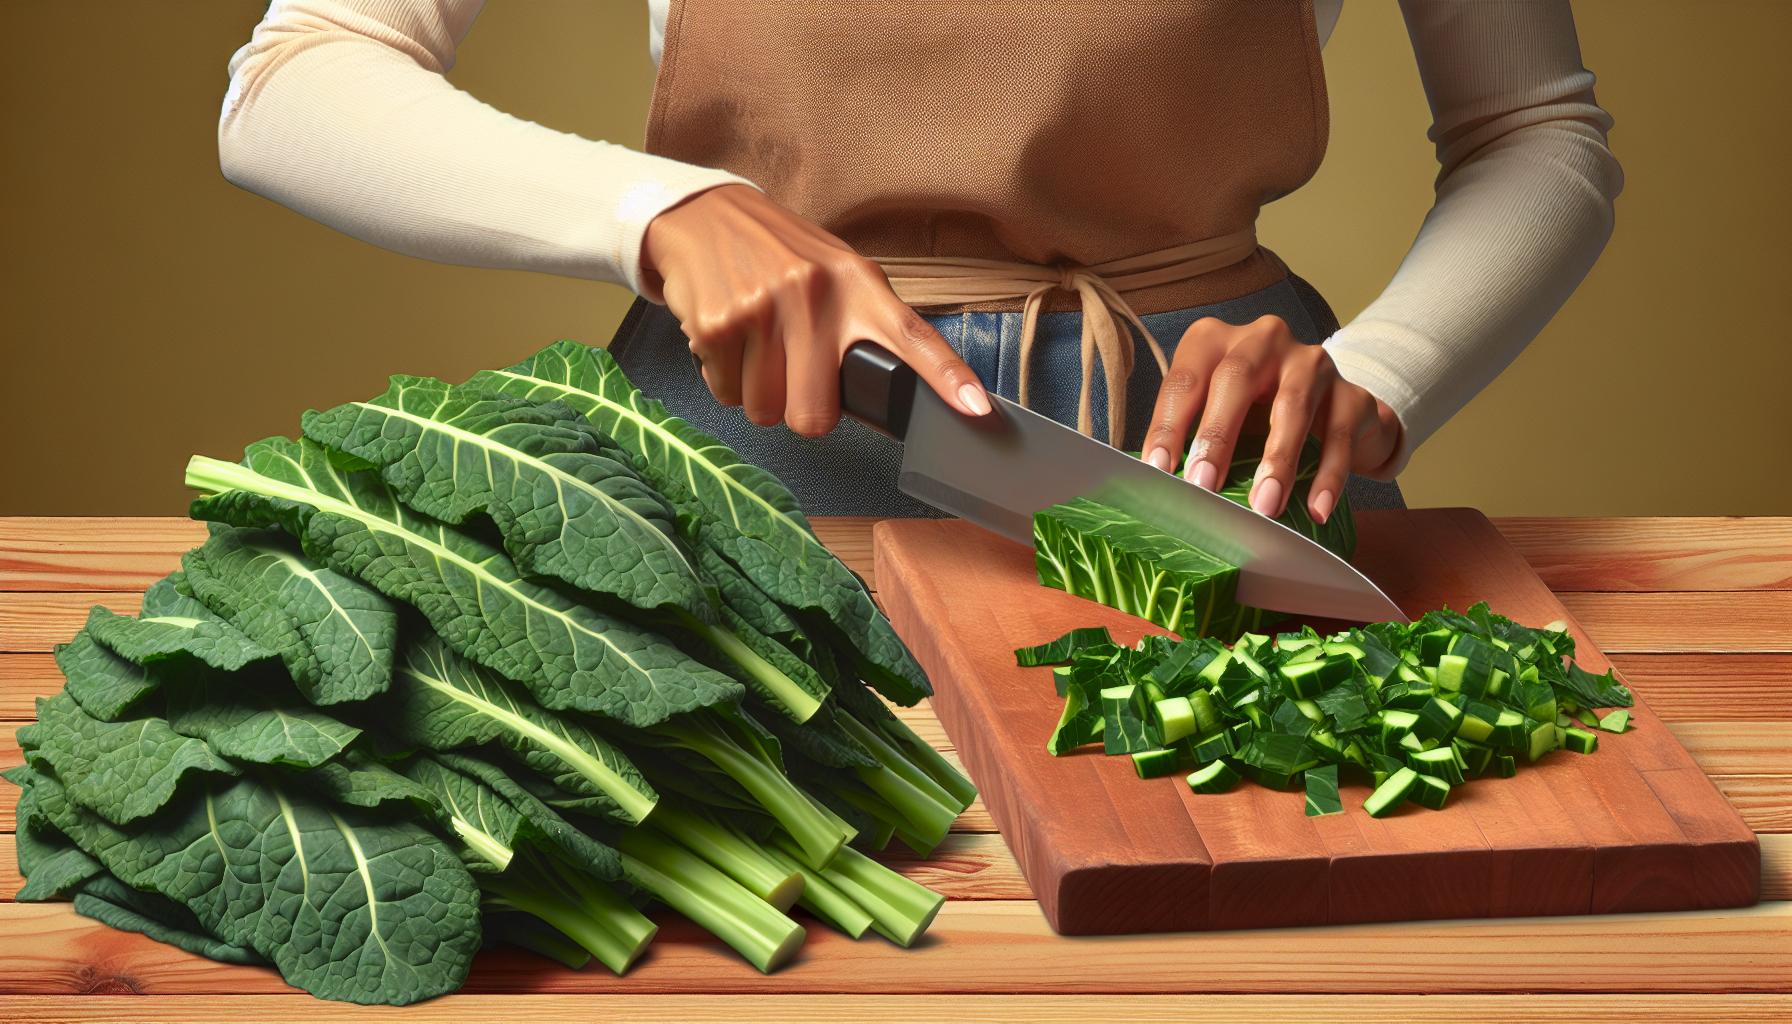
Cut collard greens into uniform pieces slightly larger than bite-sized portions. Lay several leaves flat on a cutting board, stack them neatly, then slice them into 2-inch wide strips. Create manageable portions by cutting these strips crosswise into squares.
Three cutting options enhance freezer storage efficiency:
- Rough chop: 2-inch squares for traditional Southern-style cooking
- Fine strips: ½-inch ribbons for quick-cooking dishes
- Large pieces: 4-inch sections for wraps or stuffed collards
The size affects thawing time and cooking applications:
| Cut Size | Thaw Time | Best Used For |
|---|---|---|
| 2-inch squares | 2-3 hours | Braising, soups |
| ½-inch strips | 1-2 hours | Sautéing, stir-fries |
| 4-inch pieces | 3-4 hours | Wraps, casseroles |
Keep the cuts consistent to ensure even blanching in the next step. A sharp knife creates clean edges, preventing bruising that leads to freezer burn.
3. Pat leaves completely dry

Thorough drying prevents ice crystals from forming on collard leaves during freezing. A salad spinner removes 90% of surface moisture in 30 seconds of spinning. Pat the spun leaves between clean kitchen towels or paper towels to absorb remaining water droplets.
Three effective drying methods:
- Spin 2-3 cups of leaves in a salad spinner for 30 seconds
- Layer leaves between absorbent towels and press gently
- Air dry leaves on a wire rack for 15 minutes if time allows
Important: Check leaf creases and stems for hidden moisture. Any remaining water leads to freezer burn and reduced storage life. Feel each leaf’s surface – it should be completely dry to the touch before moving to the next preservation step.
4. Pack in freezer bags

Place dried collard greens in freezer-safe plastic bags, removing as much air as possible to prevent freezer burn. Fill each bag 3/4 full to allow space for the greens to expand during freezing.
- Label bags with the date to track storage time
- Arrange greens flat in a single layer
- Press air out from bottom to top before sealing
- Double-bag for extra protection
- Keep portions small (2-3 cups) for easy thawing
Stack the bags flat in the freezer to save space and ensure even freezing. Breaking apart frozen portions becomes easier when greens freeze in a thin layer rather than a solid block. Vacuum-sealed bags provide maximum protection against freezer burn, extending storage life up to 12 months.
Store collard bags in the coldest part of the freezer at 0°F (-18°C). Place newer packages behind older ones to use the oldest greens first.
5. Remove air and freeze”
Pack the blanched collard greens in freezer-safe storage bags while removing excess air to prevent freezer burn. Press firmly on each bag to expel air pockets then seal the top, leaving 1/2 inch headspace for expansion.
Storage tips for optimal freezing:
- Label bags with the date using a permanent marker
- Lay bags flat in a single layer while freezing
- Stack frozen bags horizontally to maximize space
- Place in the coldest part of the freezer at 0°F (-18°C)
- Use vacuum-sealed bags for up to 12 months storage
- Store standard freezer bags for 6-8 months
Quick freezing methods:
- Manual air removal – Press bag contents to remove air bubbles
- Straw method – Insert straw near seal to suck out remaining air
- Water displacement – Submerge unsealed bag in water to force air out
- Vacuum sealer – Use machine to remove all air professionally
Store bags flat initially to freeze contents evenly. Once frozen solid after 24 hours, bags can be repositioned vertically to save space. Remove older packages first when using frozen collards.

