
Crafting the perfect bowl of chili is an art form that walks the tightrope between simmering too little and too much. For those in pursuit of that just-right texture and depth of flavor, understanding the ideal simmer time is key.
With a seasoned pen, I’ll guide you through the nuances of chili perfection, from quick broths to slow-cooked wonders. The secret? It’s all in the timing.
But how long is just right? The answer might surprise you, and it’s waiting just beyond this sentence.
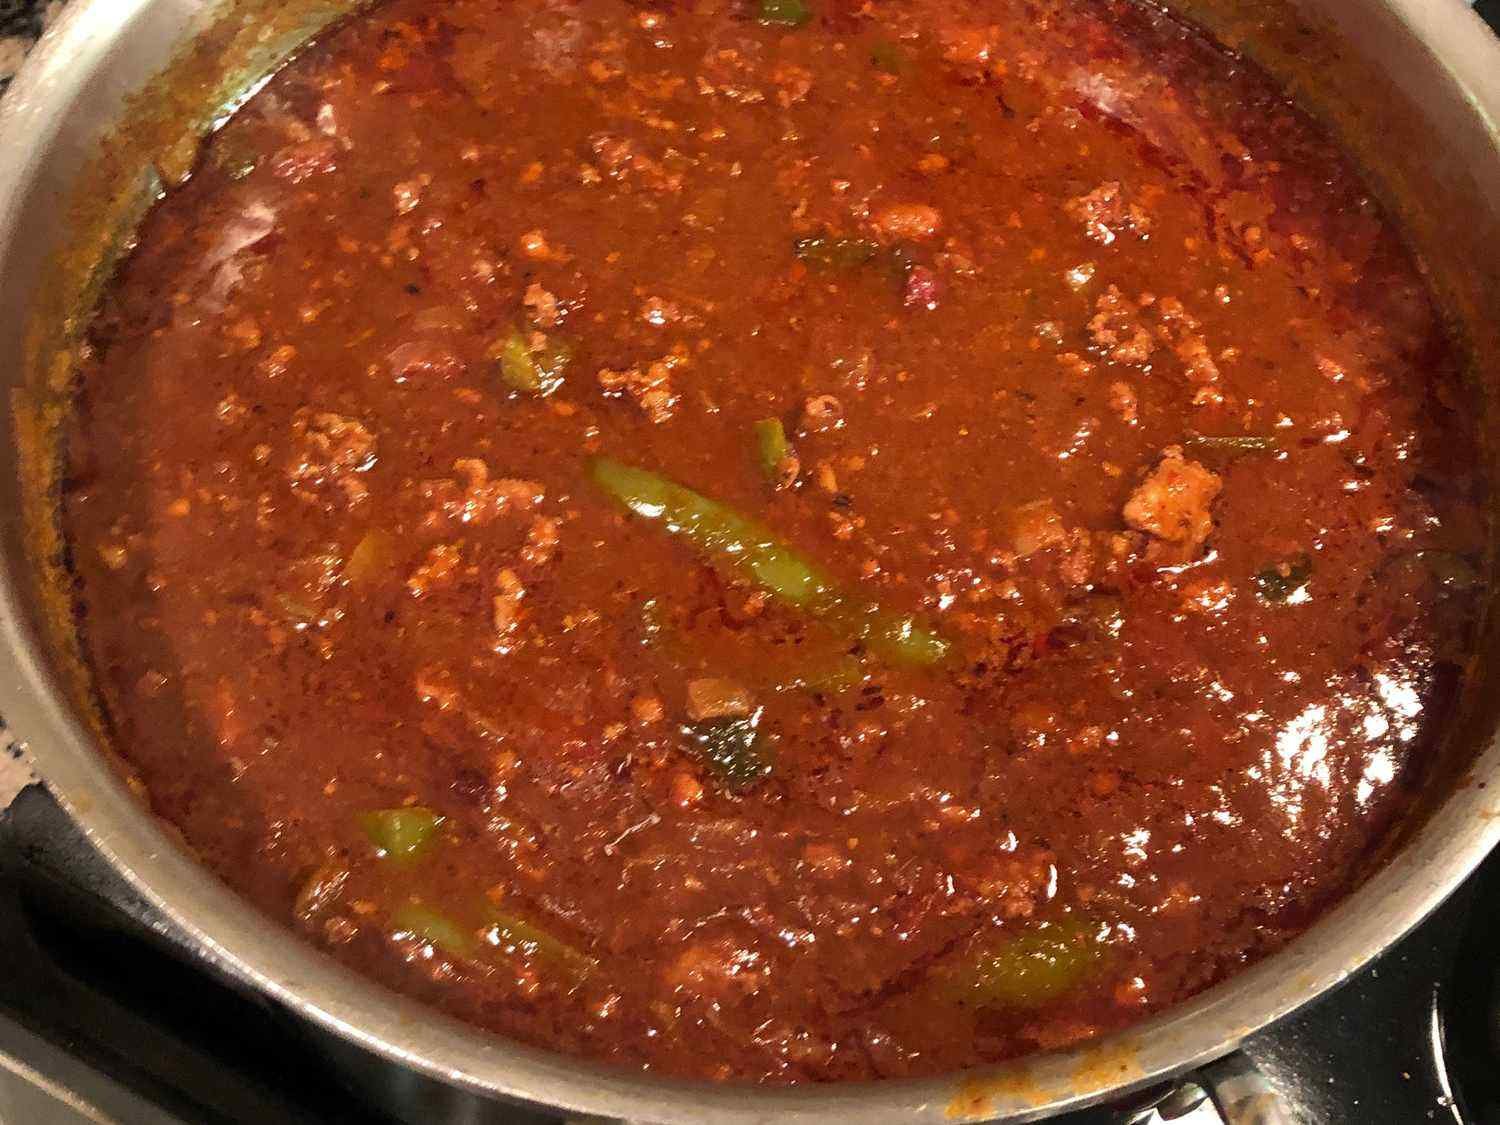
To achieve the perfect chili, simmering is key. The ideal simmer time is typically between one to three hours on a medium-low heat. This allows the flavors to meld and the chili to thicken to the desired consistency. For a deeper flavor, a longer simmer on low heat works wonders, but even a one-hour simmer can yield a delicious result. Remember to stir occasionally to prevent sticking and to check for seasoning adjustments.
The Best Simmer Times For Different Chili Types
Preparing your chili ingredients and wondering about the cooking time?
For beef chili, a simmering duration of approximately 2 hours is optimal to ensure the meat becomes tender and the flavors combine well.
If you’re making turkey or chicken chili, set your timer for around 1 hour. This allows the flavors to meld without the need for lengthy protein cooking times.
Vegetarian chili is even quicker, requiring just about 30 minutes of simmering. Here, the focus is on allowing the flavors to come together, as there’s no meat to cook through.
1. Beef Chili

For beef chili, the duration of simmering can have a significant impact on both the dish’s flavor and its texture, with times typically ranging from 1 to 3 hours.
Allowing the chili to simmer melds the flavors together and softens the meat, resulting in a deeply satisfying meal. Here is a brief guide to assist you in achieving the ideal simmer duration for your beef chili:
| Simmer Duration | Meat Texture | Flavor Depth |
|---|---|---|
| 1 hour | Soft | Gentle |
| 2 hours | Softer | More pronounced |
| 3 hours | Very soft, easily falls apart | Very rich |
The choice of simmer duration should align with your personal taste preferences regarding the meat’s texture and the intensity of the flavor.
Keep in mind, the longer the simmer, the more intricate and enjoyable the flavors in your beef chili will become, offering a delightful taste with each bite.
2. Turkey or Chicken Chili

When cooking turkey or chicken chili, allow the mixture to simmer for 30 minutes up to 1 hour. This range is ideal for enhancing the dish’s flavor and ensuring the poultry is tender and thoroughly cooked.
This shorter simmering time, relative to beef chili, is due to poultry’s faster cooking properties. It’s key to keep the heat low enough to maintain a gentle simmer; too much heat can make the meat tough, while a softer simmer helps flavors blend well and keeps the meat juicy.
For optimal flavor, add the poultry once you’ve sautéed your base vegetables and spices. This technique makes sure each bite is full of the deep, complex tastes fans of chili appreciate.
The aim is to have a chili where the meat is cooked just right and the flavors are fully developed within the mentioned timeframe.
3. Vegetarian Chili

Focusing on vegetarian chili, the simmering period plays a crucial role in enhancing the flavors and consistency of the meal. An ideal simmering duration is between 30 minutes and 1 hour.
This allows the mix of vegetables and beans to soften just right, blending their tastes together without making them too soft.
Should your chili have harder ingredients like raw squash or carrots, opt for the longer simmering time. Using canned beans? Since they’re already soft, a shorter simmering period is preferable to keep their texture.
The secret to a delicious, hearty vegetarian chili is giving enough time for all spices and aromatic components to impart their flavors into the broth, achieving a complex and layered flavor profile.
Liquid in Chili: How Much and When

Getting the liquid level right in your chili is key for that perfect blend of flavors and thickness. Kick things off with just enough liquid to snugly cover your ingredients.
This could be broth, water, or a mix. Here’s the trick: as your chili simmers, the liquid reduces, amping up the taste. But keep a keen eye! Too much liquid, and you’re in soup territory. Too little, and you might just scorch your masterpiece.
So, what’s the move? Start with your ingredients nicely covered, then play it by ear. Need more juice? Pour some in. Things looking a bit swampy? Let it simmer uncovered. The magic happens in the adjustment. And hey, always easier to add than to take away, right?
Keep a close watch, especially as you cruise into the home stretch of cooking. That’s your prime time to reach the perfect chili consistency.
Your goal? A chili that’s hearty, not watery, but still with enough sauce to coat the back of a spoon. Trust me, nailing that balance means you’re in for a delicious bowl of chili that hits all the right notes.
Secrets to Enhancing Chili Flavor During Simmering

- Toast your spices before you throw them in. This step brings out a deeper, more vibrant flavor.
- Slow cooking is your friend here. Letting your chili simmer gently allows those flavors to mingle and marry, resulting in a more cohesive taste.
- Sweeten the deal with a touch of sugar or honey. This isn’t just for sweetness; it’s a clever way to balance the heat and acidity.
- Don’t forget a splash of vinegar or a squeeze of lime right at the end. This brightens everything up, giving your chili that final punch of flavor.
Simmering Chili on the Stove – Step-by-Step Guide

After enhancing your chili to its flavorful best, the next step involves perfecting the simmering technique on your stove. Begin by moving your chili blend into a big pot, ensuring there’s enough room for thorough mixing.
Adjust your stove to a low setting to maintain a soft simmer rather than a vigorous boil. This gradual cooking approach is crucial for melding the flavors harmoniously.
Allow the pot to remain partially open, mixing now and then to avoid any ingredients from sticking and to guarantee uniform heat distribution.
Keep an eye on the chili’s consistency; it should become thicker as it cooks. Depending on your specific chili concoction and the thickness you prefer, this could take anywhere from 20 minutes up to a few hours.
Periodically taste the chili, tweaking spices if needed to hit that flavor sweet spot. A bit of patience here can really make a difference in bringing out the best taste of your chili on the stove.
Simmering Chili With The Slow Cooker – Step-by-Step Guide

Exploring the method of simmering chili using a stove has been insightful, but shifting our focus to the slow cooker technique offers a more relaxed cooking experience. The slow cooker excels at merging flavors over extended periods, resulting in a deeply flavored and complex chili.
Here’s a straightforward guide:
- Sear Your Meat: Should your recipe include meat, sear it in a pan before adding it to your slow cooker. This enhances the flavor profile significantly.
- Stack Ingredients: Begin with any liquids at the base, followed by your spices, vegetables, and finally the meat. This sequencing ensures that everything cooks evenly and flavors are well distributed.
- Let It Cook Gradually: Opt to set your slow cooker to low for a duration of 6-8 hours or on high for 3-4 hours. Opting for a prolonged, gentle cook will reward you with chili that’s both tender and rich in taste, justifying the wait.
Is Chili Better The Longer It Simmers?

Allowing your chili to simmer for a long period typically enhances its taste, making the wait well worth it.
The slow bubbling process allows the various components to blend seamlessly. The spices especially gain from extended cooking times, as they release their robust flavors into the dish more effectively.
Additionally, tougher meat cuts soften during the prolonged simmering, turning exceptionally tender. This method also helps reduce any surplus liquid, naturally thickening the chili and intensifying its flavors.
If your goal is to create a chili that’s flavorful, with an in-depth taste and perfectly soft meat, letting it cook slowly on the stove can transform a decent meal into an exceptional one.
Should You Simmer Chili With Lid On or Off?

When deciding on the method to simmer your chili, the final texture and flavor intensity you’re aiming for are crucial considerations. Here are the key points:
- Simmering without a cover lets extra water evaporate, making the chili thicker and the tastes more robust. This approach is perfect if you want a denser consistency and stronger flavors.
- Simmering with a cover traps moisture inside, leading to a more liquid chili. This method suits those who enjoy a chili that’s closer to a broth in texture.
- Using both methods can provide an optimal outcome. Begin without a cover to let some liquid evaporate and concentrate the flavors, then put the cover on to allow the ingredients to blend together without reducing the liquid further.
Make your choice based on the type of chili you prefer and remember to stir now and then to keep it from sticking.
